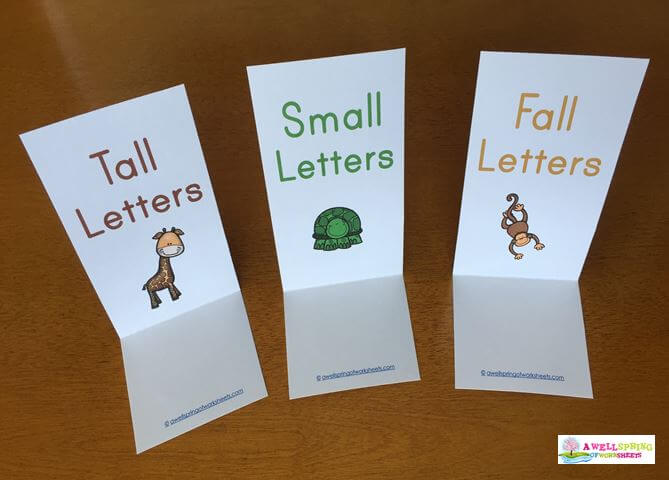
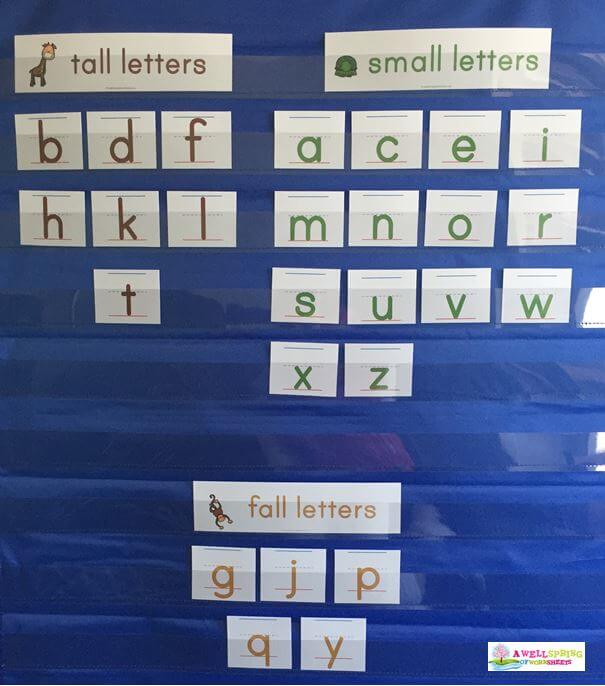
Here’s a fun way to teach your kids about letters! When you teach your kids the idea of print awareness and how letters are formed, pack in these lessons about tall, small and fall letters. The resources on this site for teaching this concept divide the letters into these three categories by using color-coding, animals, pocket chart cards, posters and worksheets. Tons of learning fun ahead!
You can find all the resources in this blog here, or you can click on any image or link in this post.
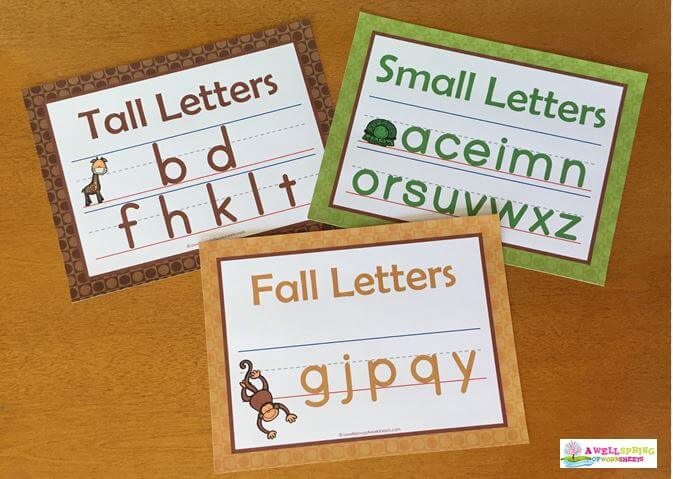
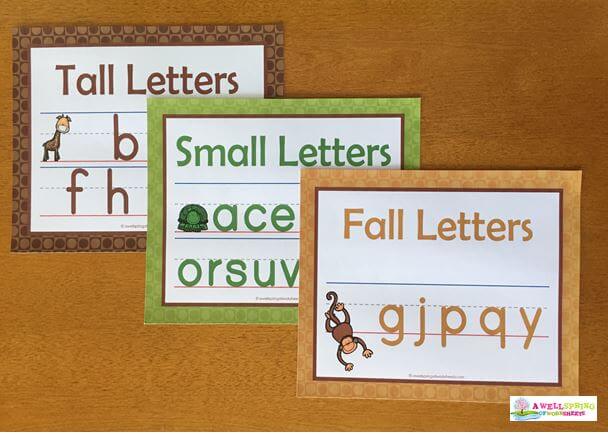 Tall, Small and Fall Posters – Just a Small Sample of What’s In this Set!
What are Tall, Small and Fall Letters?
Tall, small and fall letters are fun categories the letters of the alphabet can sorted into based on their position on primary writing lines. Some people call these “tall, small and fall letters” like I do, but other people call them “tall, small and letters that fall”. Either way, it’s pretty obvious the letters of the alphabet all fall (no pun intended!) into the same three categories.
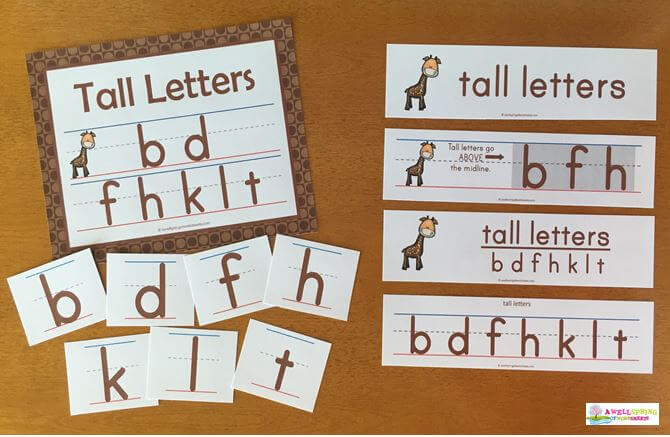
Tall Letters
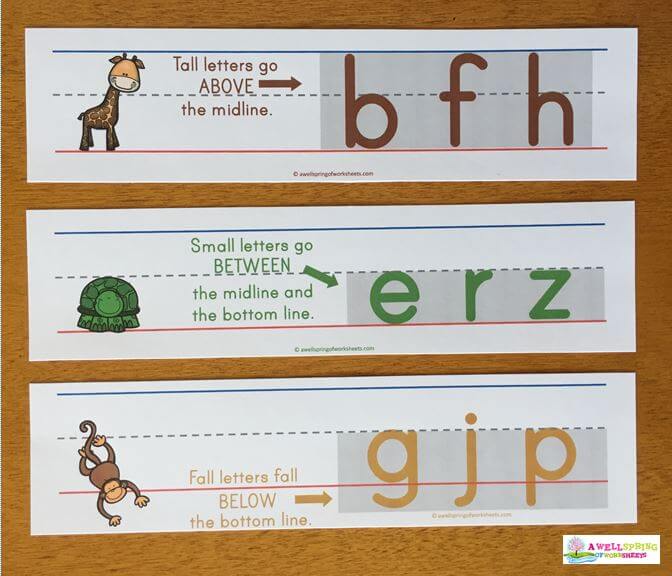
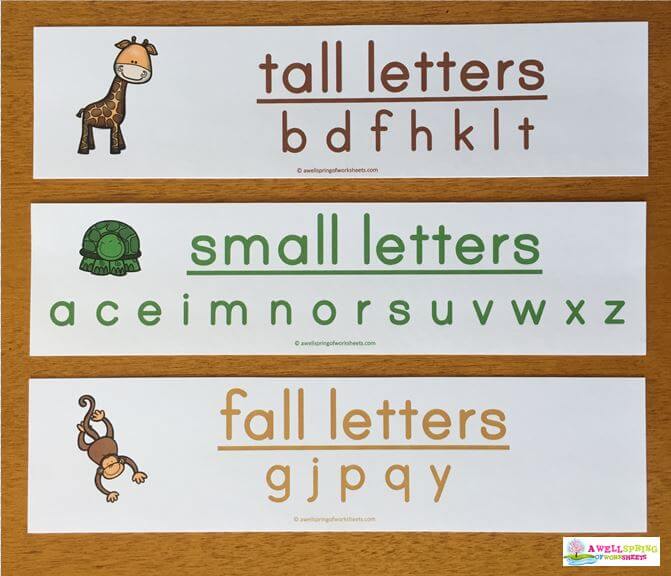
Tall letters can be described as letters that touch both the top and bottom line. Sometimes though, depending on the font used, the letters don’t reach all the way up to the top line, but they are always above the dashed middle line. The seven tall letters are: b, d, f, h, k, l and t.
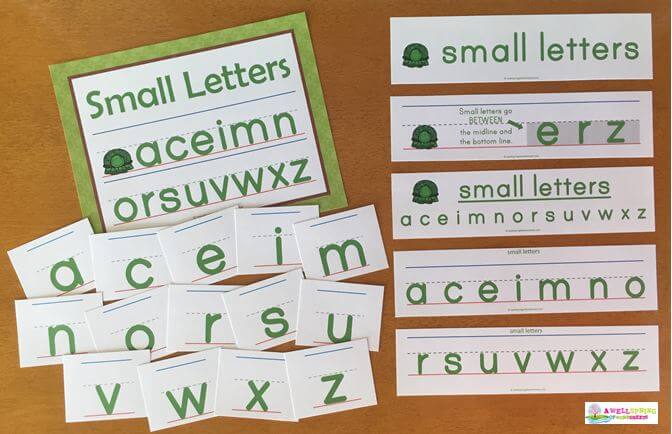
Small Letters
Small letters are letters that touch the bottom line and the dashed middle line. They do not go above or below these lines. The fourteen small letters are: a, c, e, i, m, n, o, r, s, u, v, w, x and z.
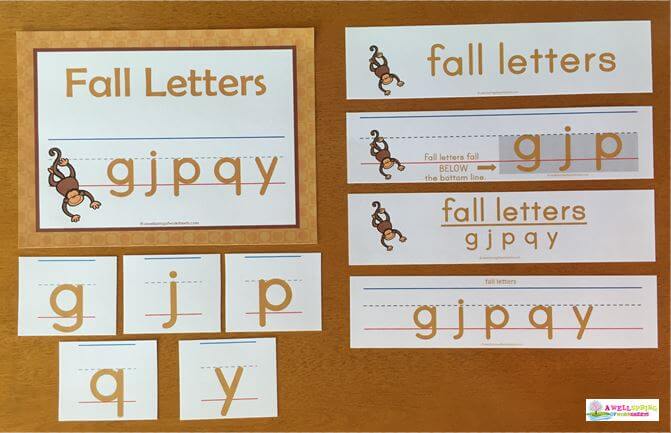
Fall letters are letters that fall below the bottom line (or base line) of the primary writing lines. The five fall letters are: g, j, p, q and y.
Note #2: There are two dotted letters – i and j. From the info I found on this topic I found the i in both the tall and small categories. The j could be considered a tall letter because the dot goes above the dashed mid-line and a fall letter because the hook goes below the base line. For the sake of simplicity, I didn’t take the dots into consideration when I created these resources. Therefore, the i resides with the small letters and the j with the fall letters.
Tall, Small and Fall Letters – Divided into Fun Categories
They’re Color Coded!
I’ve divided the tall, small and fall letters into simple color codes. Because I’m assuming these concepts will be taught sometime near the beginning of the year in the fall, I made them in fall colors.
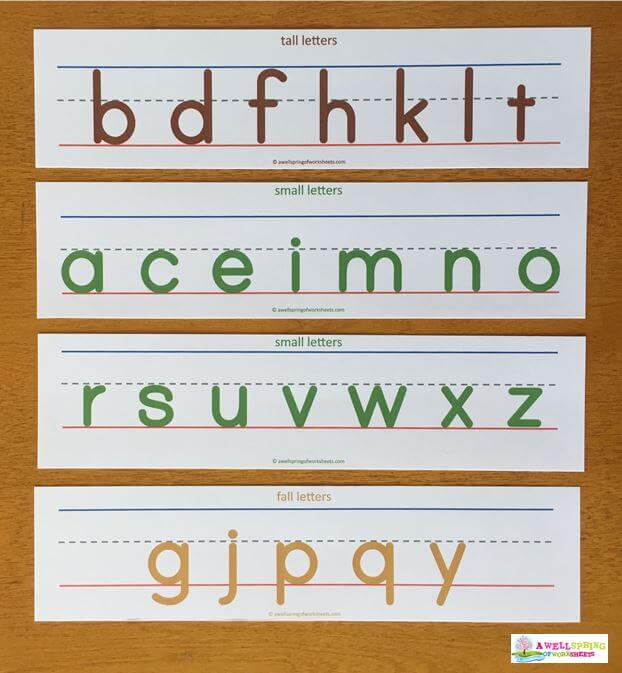
The tall letters are in brown, the small letters are in green and the fall letters are in a golden color. As you can see in the images below, these resources include a poster, pocket chart cards (or strips) and a set of letters.
The tall letters in these resources are represented by a cute giraffe. Giraffes, as we know, have those long necks that stretch way up to the trees. They share that trait with these letters that stretch all the way up to (or near!) the top line.
Turtles don’t stretch much. Their arms, legs and head pop in and out of their shells, but they don’t add much to their overall dimensions so I thought they represented the small letters perfectly.
Monkeys are fun-loving creatures. Since they jump up and down and swing around, I thought this low-swinging monkey was a great fit for the fall letters.
The main purpose of these resources is to use them in whole group or small group lessons as a sorting activity during the time of the year when you teach your kids about letter formation and structure.
My suggestion would be to start a lesson with a pocket chart sorting activity and then finish up the lesson with one of the worksheets (below). The pocket chart activity teaches the lesson and the worksheet reinforces the concepts. It also gives the kids a chance to change gears and focus their attention on one thing for 10-15 minutes, then another thing for another 10-15 minutes.
Pocket Chart Cards
The pocket chart cards in these sets include four basic pieces for each of the tall, small or fall letters in their representative color scheme.
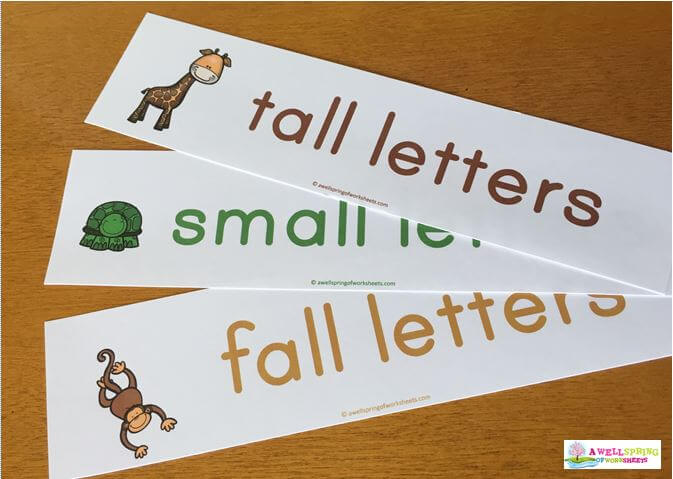
First, there is a title card. These cards have the name of the letters with an image of the animal that represents that type of letter.
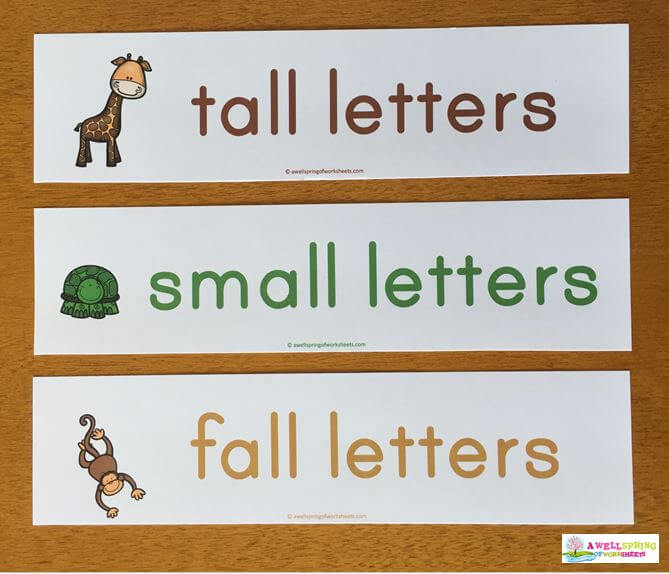 Tall, Small and Fall Letters Title Pocket Chart Cards
Second, there is a card that tells how to tell if a letter is a tall, small or fall letter. You saw these before, but here’s another picture. The giraffe, turtle and monkey are also on these cards, but off to the left as a visual to show how the letters fit between the various lines.
There are three sets of letters in my tall, small and fall set. They were created with different skill sets in mind, so you have options of which set to use with your kids. I had fun creating these so I hope you have fun using them in your classrooms!
The first set of letters is color-coded on primary writing lines. If your kids have caught on to the color scheme, they’ll know right away which category each letter goes into.
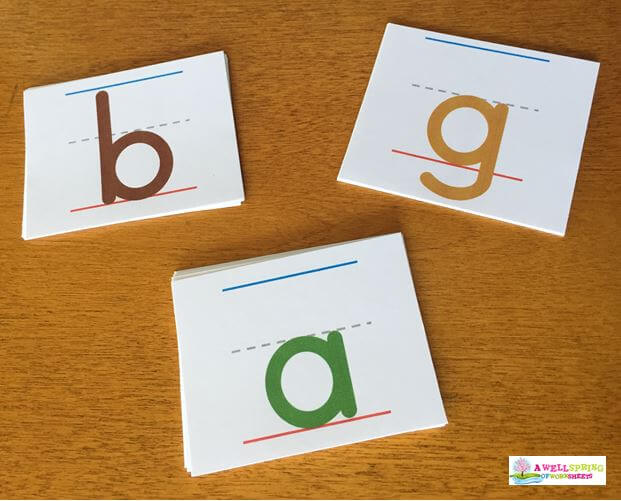 Tall, Small and Fall Letters Color-Coded on Primary Writing Lines
The second set has each letter with the accompanying animal next to it. These are for your lessons or activities where you’ve chosen to use the animal association. I think they came out really cute! For your sorting activities these cards make the association a cinch. Kids just match the animals.
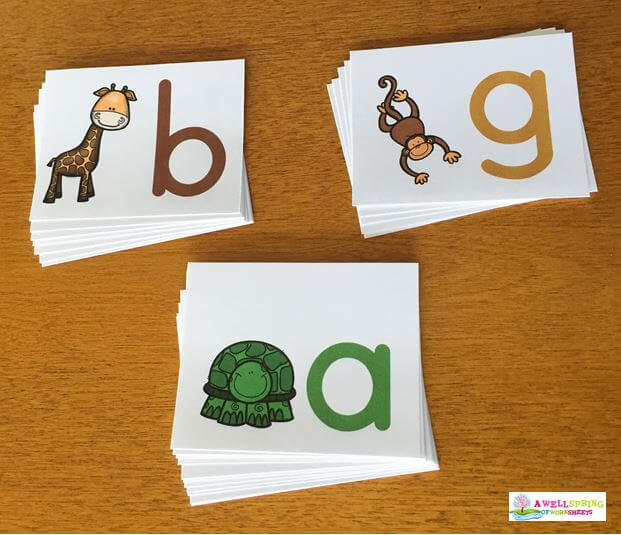 Tall, Small and Fall Letters Color-Coded with Animals
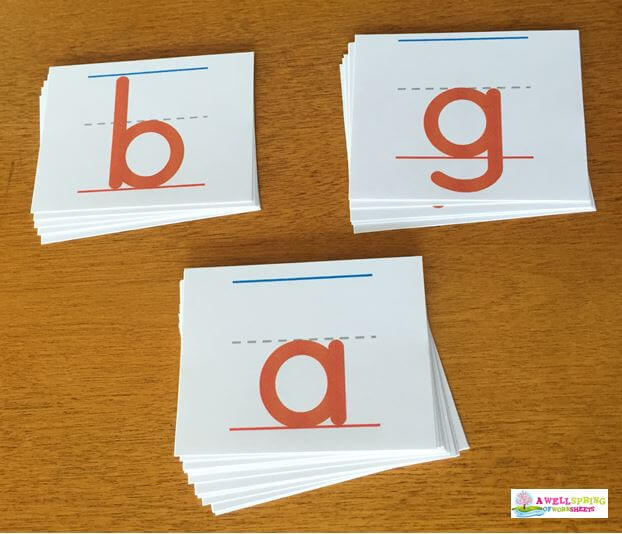
In the third set of letters, you will find that the letters are on primary writing lines and that they are all the same color. If you have kids sort these letters into the tall, small and fall categories, they may have to do some thinking and take a close look at each letter. There is nothing that sets one letter apart from the others.
Sorting Worksheets
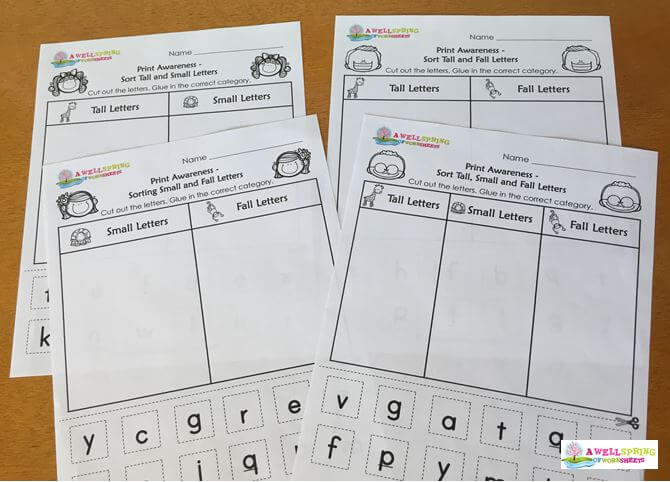
Included in this set are four cut and glue sorting worksheets. They cover the gamut of the three ways you can group the letters by two (tall and small letters, small and fall letters, and fall and tall letters), and then a worksheet with all three kinds of letters on one page. Each worksheet has twelve letters that kids cut out and glue onto the page into the correct category.
One thing to note is that the letters on these pages are not on primary writing lines. If kids are really new to being exposed to the alphabet then a small group setting might be needed so they can get more one-on-one help with gluing in the right place.
Writing Worksheets
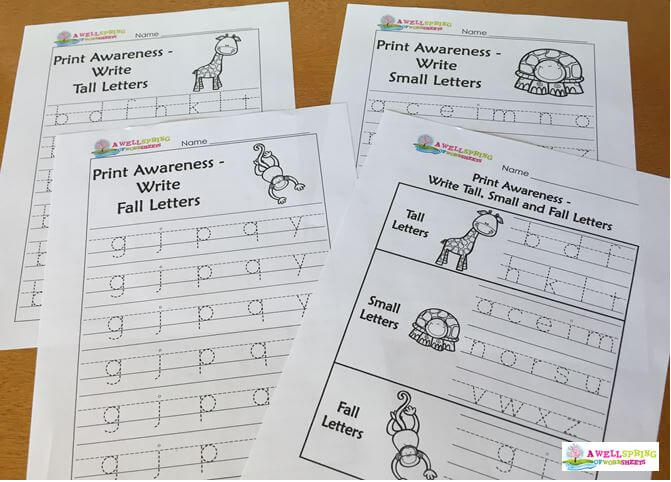
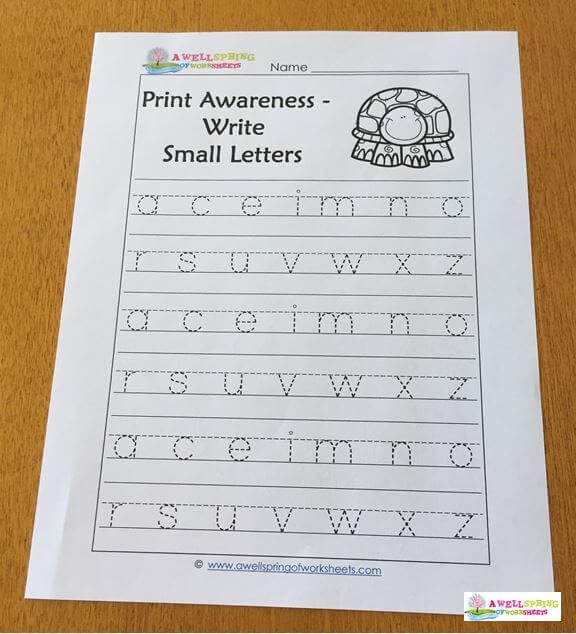
These writing worksheets, or I could say tracing worksheets, give kids the opportunity to trace the letters in each category several times each. Kids may need some prior experience tracing or writing letters as these letters do not have dots and arrows showing them which way to properly trace the letters.
Other Resources
Posters
I’ve included a set of posters, one for each set of letters so you can post them on your classroom walls, on your white board, or at or near a writing center. You can have kids refer to them for a while while you’re learning about these letters or you can leave them up all year long.
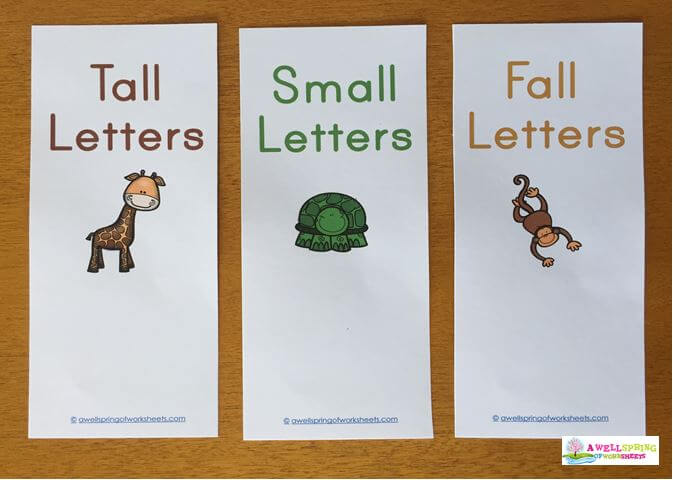
These sorting strips are meant to be used for a sorting activity. Simply print the page on card stock, cut it into three sections along the dashed lines, and fold the bottom of each card up about 2-1/2 to 3 inches. Place each card in a basket like in the picture below. I got the baskets in a set of six online from Oriental Trading Company.
Use one of the letter sets shown earlier in this blog post and have kids sort the letters. You could even make several sets and use them as a center activity. Kids can work alone or with a partner.
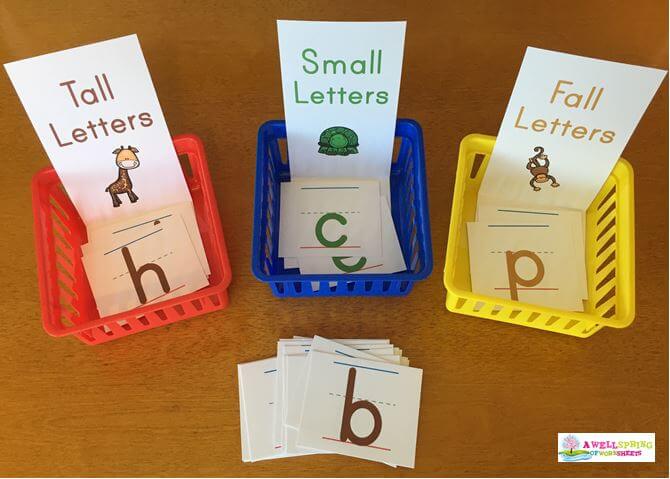 Sorting Activity Using the Sorting Strips and the Color-Coded Letters
Lesson Suggestions
Since the concept of tall, small and fall letters is part of learning how to form letters, I would suggest you teach these letter types to your kids when you teach them about print concepts/print awareness. This would be in kindergarten around the time you’re teaching your kids their letters in the fall, or even in the winter. Another option would be in first grade as a fun way to review how letters are written.
I have several suggestions of how you can use these resources. I’m thinking along the lines of a one to two week approximate 30 minute lesson at the same time each day.
For each lesson I recommend you start with instruction and/or sorting activities using the pocket chart cards and follow-those up with a hands-on worksheet. You could start out using the pocket chart cards as a whole group activity and follow-up with using one of the worksheets in a center time, you could present the pocket chart instruction in a small group and then follow-up with a worksheet in the small group, or you could go whole group with the instruction and the worksheets.
I’ve added some pictures below along with some suggestions of how to go about each lesson.
Pocket Chart Instruction and Activities
To start out with, I’d recommend taking the first lesson using the pocket chart cards to introduce the concept of tall small and fall letters. You can use the title cards and the description cards to visually show kids what these letters look like and what the criteria are for each category.
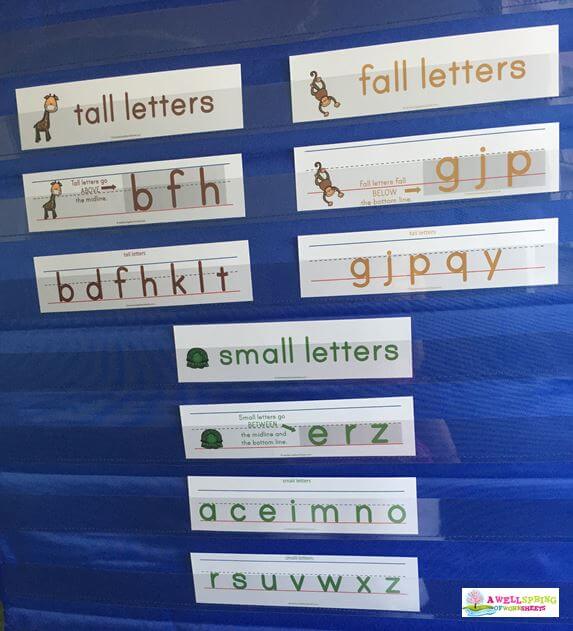 Introduce the Concept of Tall, Small and Fall Letters Using these Pocket Chart Cards
For the next three days, I’d focus in on one of the categories in particular. For instance, On Monday you could have started with introducing the letters (above), then on Tuesday, Wednesday and Thursday you could focus on the tall letters, the small letters and the fall letters respectively. Put the title card and the description card in the pocket chart. You can talk about how the letters are represented by a color and an animal.
You can have all the letters in one of the letter sets in the pocket chart, too. You can go through the alphabet letters and ask the kids if each letter falls into that particular category. If they say yes, you can take that letter and put it under the title card. Here’s a few visual examples:
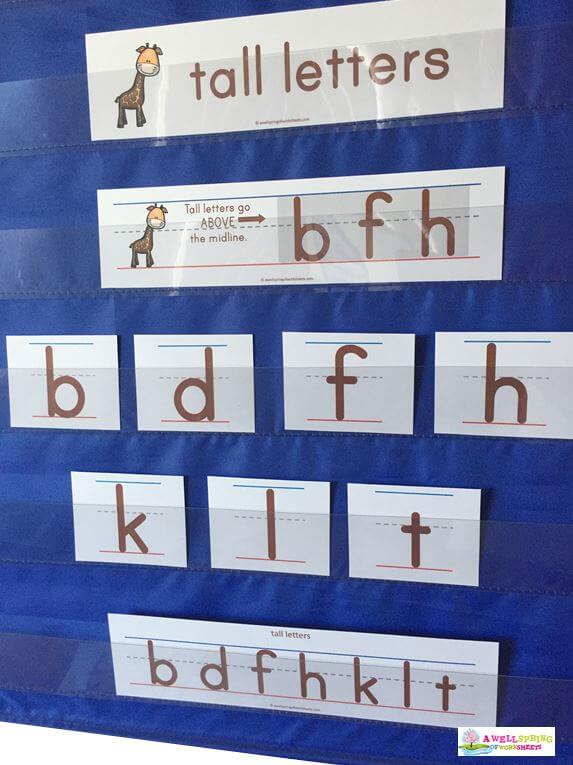 Tall Letters Displayed in the Pocket Chart During a Lesson
You can use the pocket chart card with all the letters in that category to see if the kids found all the letters. Of course, it will be easy-sneezy if you use the color-coded letters!
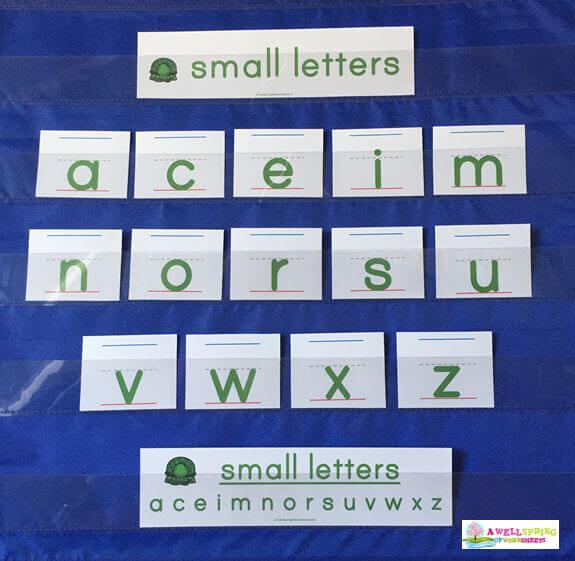 Small Letters Displayed in the Pocket Chart During a Lesson
There are only five fall letters. They’re kind of easy to pick out because of the hook or line that goes below the bottom line.
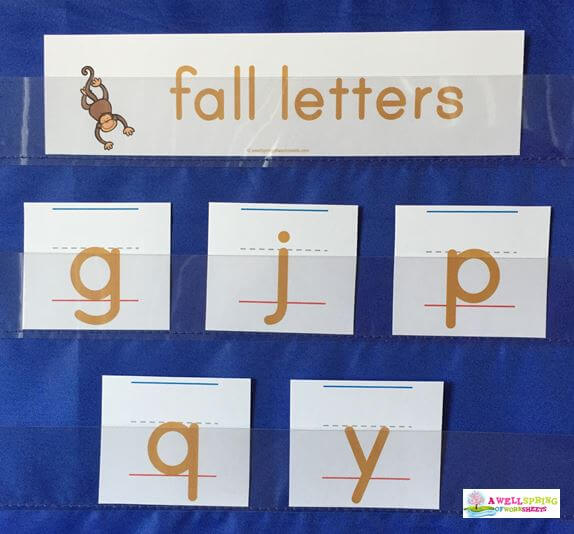 Fall Letters in a Pocket Chart During a Lesson
You could finish up on the last day of your lessons (possibly a Friday), by reviewing all the tall, small and fall letters. Put the title cards in a chart and one of the sets of letters and call on the kids to come up to the pocket chart and pick a letter and put it in the correct category.
The first week you could use the color-coded letters you see above, and the second week you could review the concepts using the letters with the animals on them and then graduate to the letters that are all one color.
Sorting and Writing (Tracing) Worksheets
As I mentioned earlier, you can follow-up the pocket chart instruction and sorting activities with one of the worksheets. I’d recommend the tracing worksheets to start out with because they have only one letter on each page. So if the lesson focused in on the small letters, I’d use the writing (tracing) worksheet for the small letters as a follow-up. Have the kids tell you what makes a small letter and small letter and how they fit in between the lines.
After one week of introducing the concept of these categories of letters, why not take a second week to practice some more? Once the kids are familiar with all the letter categories you could have them work on the sorting worksheets. Kids get to use their letter distinguishing and fine motor skills and cut out the twelve letters and glue them in place. This might be a good activity to do in a small group with an adult to help them if needed. Once kids cut out the letters they might get confused as to which letter is a “b” or a “d” or a “p” or a “q” so these letters have been underlined.
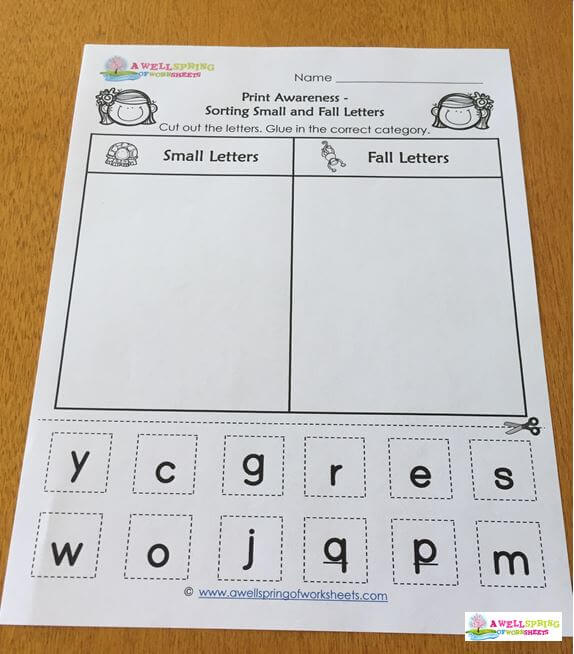 Sort the Small and Fall Letters with this Worksheet
You can also have the kids work on the worksheets with all the letters, like this writing worksheet.
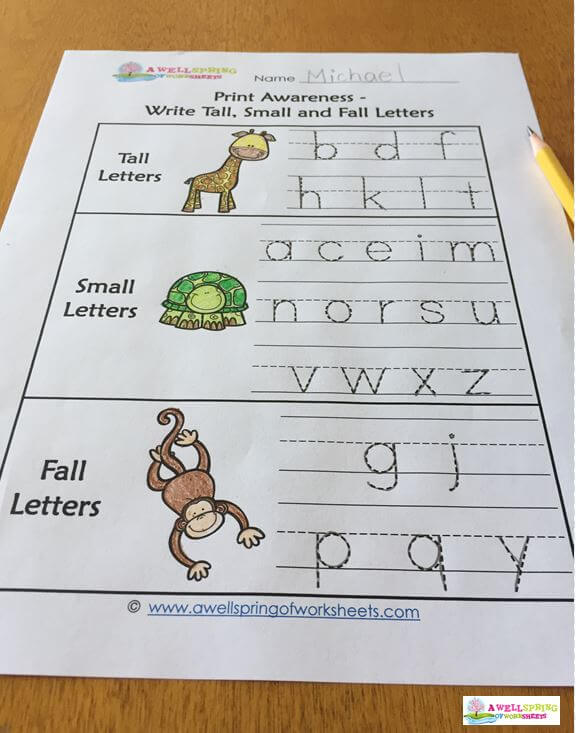 Tall, Small and Fall Writing Worksheet
The second week you may also want to try this sorting activity. Put the tall, small and fall strips in baskets, give a child or partnership of two children a set of the cards and have them sort them into the correct categories.
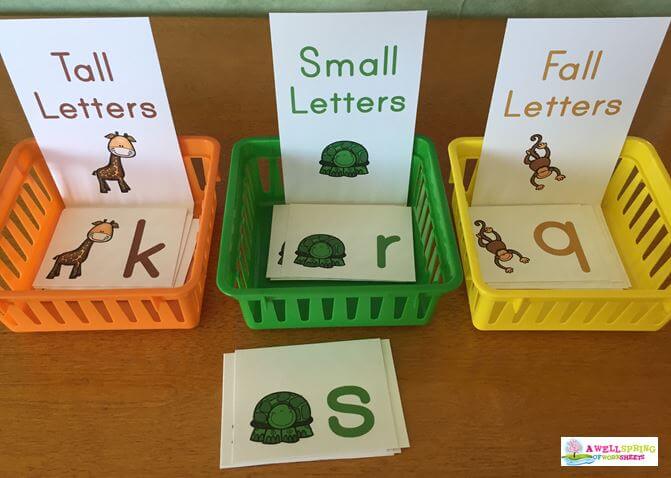 Sorting the Tall, Small and Fall Letters with the Animals on Them
As with the pocket chart sorting, you could start with the color-coded letters and then graduate to the letters that are all one color. That will get your kids thinkin’!
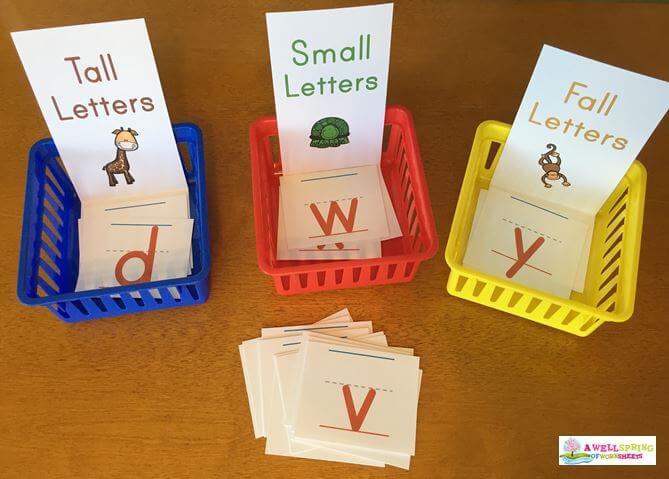 Sorting Tall, Small and Fall Letters when the Letters are All the Same Color
That’s all for this post! As always, I hope you enjoy using these tall, small and fall resources as much as I enjoy creating them!

One last note – You can get all the pages in this set on my website as individual downloads or you can get them in one easy download from my Teachers Pay Teachers store (of course you’ll need to pay the $4).


